FOLLOW ME ON INSTAGRAM

Showing posts with label Recipe. Show all posts

Saturday, June 29, 2013

Recipe: Marble Cake

Morning, earthlings! What's your plan on this lovely Saturday?

It's time to update about my weekly bake, was supposed to blog last few days but I procrastinate as usual HEH So here goes! Well, if you followed me on Instagram (username: hildamildaa), you should have known what did I bake last week (:

Once in a while, I will crave for marble cake, no idea why but I just do. Not really a healthy option but no harm indulging something sinful sometimes *chuckles in denial mode* As I was looking for recipes to bake that day, I saw this marble cake recipe. It doesn't look complicated, so I decided to give it a try! Since my family love butter cake as well. It's just like any typical butter cake, just that it requires extra few steps to make the marble effect. The ingredients are pretty easy to get too.


Ingredients:
150g butter
70g sugar
4 egg yolks
80ml milk
180g self-raising flour
2tbsp cocoa powder

4 egg whites
70g sugar
1/8 tsp cream of tartar

 Method:
  1. Preheat the oven to 160C.
  2. Beat the butter and sugar before adding in the egg yolks and milk. 
  3. Then in a separate bowl, beat the egg whites and cream of tartar, add sugar gradually.
  4. Add in the egg whites (second batter in step 3) into the first batter, beat until well incorporated before adding in the flour.
  5. Remove 1/3 of the batter into another bowl, add in cocoa powder and fold well.
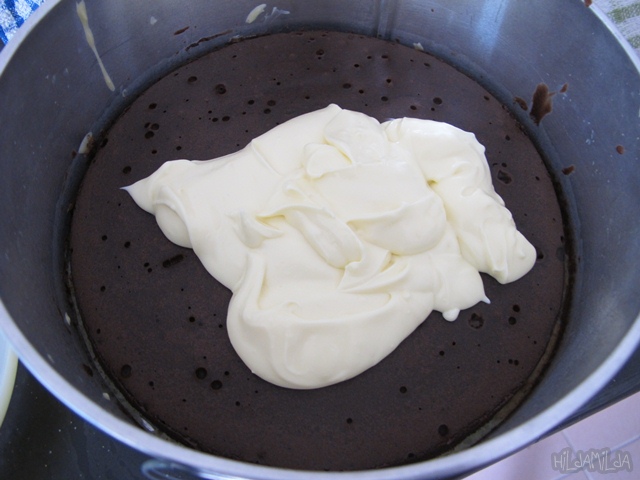
  6. Pour 1/2 of the original batter into a lined cake pan. Next pour in the cocoa batter. Finally pour in the remaining original batter.
  7. Use a chopstick to create some random designs (this is where the fun part is) on the batter (basically just draw some circles) to create the marble effect. The messier the better. You can also add a few drops of the cocoa batter on top so it doesn't look so plain on top. 
  8. Lastly, bake in oven for 50 mins.
TADAAAAAAA, the end result!
Erupted like a volcano, it doesn't look appealing T__T Probably the temperature was too high LOL 
Marbling effect wasn't that prominent too but I guess it's okay? HEHE cause I think I was pretty safe, I didn't make it messy. 
Close up of the sinful and moist marble cake I made :D 
That's pretty much it. I'll probably try another method (whole egg method) again and see if there's any difference in texture. Lemme know if you guys are gonna try this recipe or perhaps lemme know if it's successful. Either way, I hope you guys like it. Cause it's really simple and delectable too *licks finger* Especially if you have it with a cup of cold milk!

Till then, happy baking!

xx

Tuesday, June 18, 2013

Recipe: Low Fat Banana Chocolate Loaf

Hi guys!

Well if you know me, you would know baking is definitely one of the things I enjoy doing! I'll definitely try out a new recipe to bake everytime I'm home on a semester break.

So this time round, I decided to do a low-fat banana chocolate loaf. It's a bread in a way but it looks like a cake too. It works either way I guess :P The initial plan was to bake a marble cake first, but I had a few overripe bananas so I suppose it's better to make good use of them rather than throwing them away.


Ingredients: 
300 g self raising flour 
60 g sugar 
1 cup chocolate chips 
1 cup mashed banana (approximately 3 bananas)
2 eggs 
1 tsp baking soda 
1 tsp vanilla essence 
250 ml low fat milk

Oh, don't forget the secret ingredients too but it wouldn't be a secret if I tell you. So don't forget to add a cup full of love and a tsp of patience as well! HAHA Lame IKR. And for a even healthier version, it's best to use brown sugar instead and maybe you can replace the chocolate chips with berries or nuts. You can also add sliced bananas or almond slices on top of your bread. 

Daddy even got me a new set of measuring cups and spoons (^▽^) 

Method: 

  1. Preheat oven to 180C. 
  2. Sift flour and baking soda into a large bowl. 
  3. Add brown sugar and chocolate chips, mix well. 
  4. Add milk, eggs, vanilla essence and mashed banana. Gently fold the batter until well combined. Do not over mixed the batter, lumps are totally fine. 
  5. Spoon batter into a lined tin and top with almond slices or anything as desire. 
  6. Bake in preheated oven for 30 mins. 
  7. Serve warm! It tastes extra nice when it's warm (: 
Here's the end result :D
I was really happy cause I never expected it to be this successful.
Most importantly, it smells really good! 

Here's how it looks in the inside. 


Close up of the yummy banana chocolate loaf I made.

Too bad the loaf was a tad dry due to the fact that I added extra flour when the batter was runny. So do expect a slightly runny batter. The whole loaf gets even harder everytime I heat it up(; ̄д ̄) so it wasn't a total success after all #macamyestapibukan

Love the fact that this is a really easy recipe and it requires no oil or butter! Healthy much, no? It's suitable to be served for breakfast or tea. If you love banana, you'll definitely love this. Feel free to give it a try :D   

Definitely gonna bake again this week, so stay tuned for the next recipe okay? Happy baking!

xx

Thursday, June 7, 2012

Recipe: Butter Cake

So hello, I've caught a baking fever recently after recovering from a cabin fever. Anyways, thanks so much for the kind comments in my previous post, much appreciated  Back to the main topic! Kitchen is probably the place where I spent most of time besides my bedroom this holiday not because I keep finding for food to binge on but I cook and bake (: I've always been crazy about baking, though I'm still a rookie in the baking department but let's admit it that everyone loves a nice bit of cake or a nice cheeky muffin. Baking can be super easy nowadays, all thanks to premixed ingredients so now everyone can bake!

Last month, I baked a butter cake (cheat one cause I used premixed ingredients); the plain old simple but always good butter cake.
All you need for a butter cake will be this pack of premixed flour, 6 eggs and a block of butter. 
If you don't have the premixed flour, all you'll need is self raising flour, castor sugar, salt and vanilla essence. I realized that most butter cake recipes actually use milk but not in my case. 
First of all, you'll need to beat the butter til it's light and creamy so it's recommended to thaw or soften your butter before hand. Add in the eggs and flour, mix them well and continue beating it until it's all smooth and fluffy. After that, grease your baking tray before adding in the batter. Then, you're all set to shove it in the oven for an hour at 170°C.

After patiently waiting for an hour, this is the end result! ヽ(^。^)丿 Sorry bout the hole, had to check if it's perfectly cooked inside. Last but not least, you can always make your own icing to go with this butter cake or add flavouring like pandan or choc. 
I know you want some :P
As you can see, there are still certain parts that is not well-cooked but overall I gave it a pass since it's my first time #selfdenial The cake turns out not as oily as I expected probably cause I used 250g of butter instead of 300g and the texture of the cake is soft and fluffy, the family loved it and they actually finished everything in two days. #successkid.jpg Dad even requested for another butter cake, so I'll bake it again this weekend before flying off to KL next week (:

What will you do if you love both cheesecake and chocolate cake? You combine both and come out with a Brownie Layer Cheesecake! (´∀`) The initial plan was to bake a chocolate cake (Dad requested this as well HAHA) but I decided to try something more challenging last weekend so yeah but cheat one as well cause I was using premixed ingredients as well! HEHE *evil grin*
Ingredients you'll need premixed flour, a block of butter and cream cheese and 6 eggs and oh 100ml of milk as well! Again if you don't have the premixed flour, you can always search for the brownies' recipe online. Since it's a layer cake, I did the batter for the brownies and cheesecake separately. 
We'll start off with the brownie part first.
First, add in the butter into the premixed flour and mix them.  

After that, you will need to add  in 5 eggs and beat them till the batter is soft and fluffly. 
Megan is on this cracking eggs craze after she learnt how to crack one, she volunteered every single time since then.  
Then, add in the milk and continue beating the batter again. You can reduce the amount of milk you want to add if you think your batter is slightly runny. 

Mix all the ingredients well and beat it till you get a fluffy and soft texture like the photo on the right then you're done for the brownie batter(: 
Now moving on to the cheese layer;
First, add an egg and 50g of sugar into your cream cheese and mix them well till it is smooth and fluffy. Pour half of it into a baking tray and spread them evenly. I decided to put the cheese at the bottom layer first cause I want the brownie as the first layer. Instead of using an oven to bake this time, I steam it! :D For this thin layer of cheese, it needs around 20 minutes to bake under low heat. 

The brownies and cheese batter, divide both of them into another two portion for a total of four layers. 

When the cheese layer is done, you can now pour in the brownies batter, this will take almost 40 minutes under low heat as well cause it's thicker. You can always check it with a skewer from time to time (: 

That's how the brownies layer looked like when it's done, any ideas why are there holes everywhere? D: Continue with another layer of cream cheese then top it of with the remaining brownies batter. After hours of hard work and sweat over the fire, time to check out the final product! *points down*

TADAAAAAA! Not bad huh? Look like those sold in the bakery right, right? HAHA It's chocolatey and cheesy enough to my liking (: Where got people self bake and self praise one? Me lah *double facepalm* Since le parents do not favour cheese that much, they are satiated with it after a few bites T__T

That's all about my baking diary (: What's next? Muffin or cookies?

All premixed ingredients are from Emiwon Bakery Ingredients (英美皇烘焙原料店)
GF, No 60 , Parkcity Commercial Square Phase I, Jln Tun Ahmad Zaidi,
97000 Bintulu, Sarawak, Malaysia.
Tel/ Fax: 086 319989

P/S: You can get the same one from Esco Bakery Ingredients in Medan Jaya but it's much more expensive.
P/P/S: Btw, It's Elin's 21st birthday today! Loveeeee you ヾ(´▽`;)ゝ*throws confetti*

xx

Wednesday, May 23, 2012

Banana Smoothie in 3 minutes!

Since I've been at home for a few weeks and I have nothing better to do, I've been finding and reading up tons of recipes for me to try out (: Plus I'm now on a almost-healthy-diet, still trying my best to make sure I eat healthy and clean everyday or else my workout effort will be such a waste. One of the important things in eating healthy is that you eat your breakfast everyday and since I'm rarely a morning person (unless I get to eat out for breakfast, I'm choosy like that :P) thus I don't usually have breakfast and due to that, it has now become a habit that I don't eat breakfast even before going to class. I normally have brunch but fret not, I've found a solution :D
Since I don't have Greek yogurt or any drive-thru near me and I hate oats fyi, the only option would be smoothie (as stated at the bottom right of this photo)!  — Source: Tumblr  

Smoothies are so refreshing and super easy to make. You don't really need lots of ingredients or any special technique, let the blender do its thang! Since Mum bought this huge comb of bananas last week and banana is one of the top ranking healthy food, well don't let me start with the #banana-nutrition-facts blab. Click on the link yourself to find out more, maybe this link as well!

Alright, back to the banana smoothie. Healthy low fat, low calories alternative to milkshakes, cheap, and with no added sugar yet it tastes ten times better. It's really quick and requires few ingredients and one of them is ice - how simple is that!
The ingredients: 
  • 150 ml Low Fat milk (It's even better if you have skim milk but I can't get any here)
  • 2 tbsp of plain yogurt (You can a few more tablespoon if you want it to taste more sour)
  • 1 frozen banana, sliced (I would recommend you to peel it before you put it into the freezer the night before, I had a hard time peeling it the next day -_-)
  • A few ice cubes 
  • Optional: 1 tsp of vanilla extract, 1 tsp of cinnamon powder, 1 tbsp honey, other fruits like frozen strawberries, berries, peaches etc 
P/S: If you don't like milk, you can just substitute it with a cup of plain yogurt instead but I think it tastes better with milk (: 
Toss everything inside the blender and let it blend till its smooth and thick. 
And voila! Super easy and quick banana smoothie is done after two minutes. See, I purposely sliced a banana and decorate the smoothie you know! :3 Attempted to put a few in the middle of the smoothie, but it drowned in mere seconds before I even had the chance to snap it #facepalm
The ingredients that I've mentioned is enough for 2-3 glass of smoothie, so you can have it with your loved ones to kick start your awesome day (:
If you're a fan of smoothie or you feel like trying it out too, you might be interested with these links;
Healthy Diet Shakes
6 healthy fruit smoothie recipe
Now you can enjoy your banana smoothie while tweet/instagram/fb-ing about the smoothie mustache you can haz in the remaining one minute! ;D
Too bad I don't have a blender or a fridge back in my hostel, or else I can have this every single morning. Besides smoothie, you can make so much other snacks with banana like peanut butter with banana slices, nutella fudge pops with banana and even banana ice creams. It seems like I'm so into banana LOL which sort of reminds me of THIS! *points down*


I know most of you have seen this, but yeah still wanna post it up! (^ω^)

Happy smooching eh I mean smoothie-ing! :P
xx

Monday, May 23, 2011

Recipe: Red Velvet Cupcake with Cream Cheese Frosting

Finally, I baked with the help of my little assistant, Megan (:

Red Velvet Cupcakes:

125 grams self raising flour
1/4 teaspoon salt
10 grams of cocoa powder
57 grams of unsalted butter, at room temperature
150 grams of granulated white sugar
1 large egg
1/2 teaspoon pure vanilla extract
120 ml of buttermilk
1 tablespoon liquid red food coloring
1/2 teaspoon white distilled vinegar
1/2 teaspoon baking soda

Cream Cheese Frosting:

113 grams cream cheese, room temperature
57 grams of unsalted butter, at room temperature
1/4 teaspoon pure vanilla extract
30 grams of powdered sugar, sifted

This recipe makes 12 cupcakes.

The ingredients :D
Before you start mixing the ingredients, preheat your oven to 350 degrees F (175 degrees C).

#1. First, sift the flour, cocoa powder and salt together in a big bowl. Then put it aside.

#2. In the bowl of your electric mixer, beat the butter until soft for about 1-2 minutes.

#3. Add the sugar slowly and beat until light and fluffy for about 2-3 minutes.

#4. Add in the egg and beat until incorporated.

#5. Add the vanilla extract and beat until combined. Instead of using pure vanilla extract, I actually used vanilla essence, which is actually the same thing.

#6. You will have something like this in the end and put it aside.

#7. For the buttermilk, you can make it homemade by just mixing 120ml of milk with a tablespoon of white distilled vinegar but I used rice vinegar instead of white distilled vinegar.

#8. Add in a tablespoon of liquid red colouring into the buttermilk and whisk it.

#9. So when you have all the flour mixture and buttermilk ready, with the mixer on low speed, alternately add the flour mixture and buttermilk to the butter mixture, in three additions beginning and ending with flour. Remember; flour, buttermilk, flour.


#10. Mix it all well and you will have something that look like this.

#11. Now, in a small cup combine the vinegar and baking soda.

#12. Allow the mixture to fizz and then quickly fold into the cake batter.

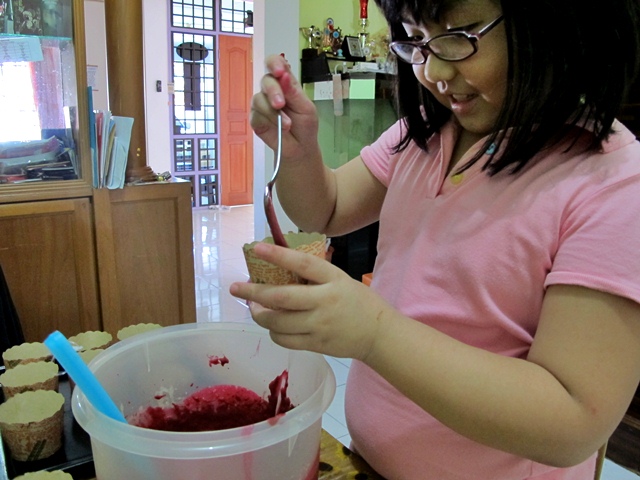
#13. Working quickly, divide the batter evenly among the 12 cupcakes cups and smooth the tops with an offset spatula or the back of a spoon. Got Megan to help me in filling up those cupcakes cup (:


#14. Turns out that the batter was only enough for 8 cups, maybe my cupcakes was a bit taller or bigger. Anyways, bake those cuppies in the preheated oven for approximately 25 to 30minutes.

#15. Moving on to the frosting, beat the cream cheese and butter together until smooth.

#16. Gradually add in the powdered sugar and continue to beat it until smooth.

#17. Lastly, add the vanilla essence and mix it well. Chill them in the frigde before applying on the cupcakes.


#18. Cool the cakes in their pans for 10 minutes and make sure they are completely cool before frosting.

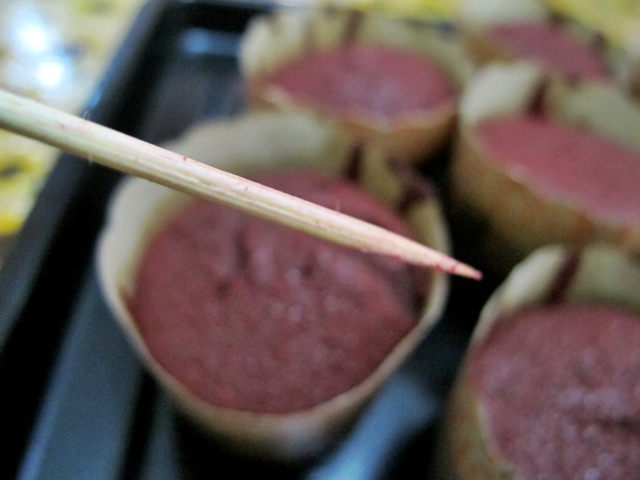
#19. You can insert a toothpick to check if they are cooked inside, or else you have to put them back in the oven and bake for a few minutes more.

#20. If it's clean like this, then it's fine (:

#21. Now this is the fun part where you can start piping the frosting and decorate the cuppies just the way you want it to be!

#22. You can even sprinkle some leftover cake crumbles like how I did :D


I'm still a beginner in baking so bear with my ugly decorations :P This is was first ever successful baking experience as well, tried baking macarons but they turned out to be macawrongs instead ): Mum said it was okay but the red colouring freaked her out! Be sure to be careful when putting this recipe together as the batter can stain, I even got a chair stained (OOPS!)  If you haven't had it before, red velvet is like yellow cake but with a little kiss on the cheek of chocolate. The cake goes really well with the cream cheese frosting and I think it's best to eat them together. Definitely, a plus for Valentine's Day or special important occasions!

Not recommend-able to those who are on strict diet, cause trust me, these little devils are deadly fattening! HAHA and maybe for those who dislike colourings as well.

But still, happy baking and OM NOM NOM-ing them!


Even a small bite can leave you craving for more So what's next?!

xx